” If I don’t want to exhibit the thing and if it cannot be re-used or improved, then I will throw it away.” Words to cull by.
Out of the corners have come some pieces of ill-used Foamula that have caused me to ask: “What was I thinking?’. However they often still possess a pink reverso, open to a further assault. This new onslaught upon the as-yet unslaught upon seeks to answer some questions regarding the application of polyurethane varnish. Before, this varnish was apt to dissolve the Foamula and required a preliminary coat of water-based primer or paint on the surface to prevent that from happening. Since then, the composition of the varnish – at least the stuff I’m using – has changed. Unfortunately the new formulation is of a brownish color and more expensive. Fortunately it now appears not to dissolve the Foamula any longer. The old veteran boards are being pressed into service to see if this is truly so.
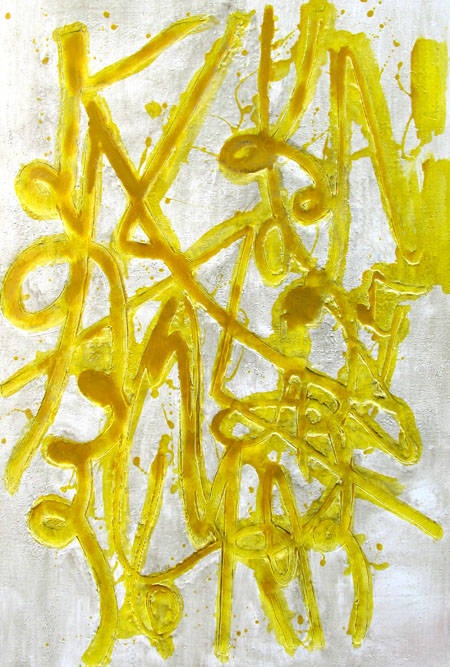
A design was drawn on the surface of this board and areas were blocked out with gesso, leaving the rest of the area bare. I then applied a hot air gun – the type used for removing paint. This caused the bare surface to shrink while the portions protected by the gesso remained relatively unaffected. I then tinted some varnish and spread it over the surface. It collected in the grooves and indentations with results that you can see. So far there have been no untoward effects.
In the interests of confirmation, I have tried a few more.
This was made the same way and with yellowed and silvered varnish. Something about it makes me think of a specimen seen under a microscope.
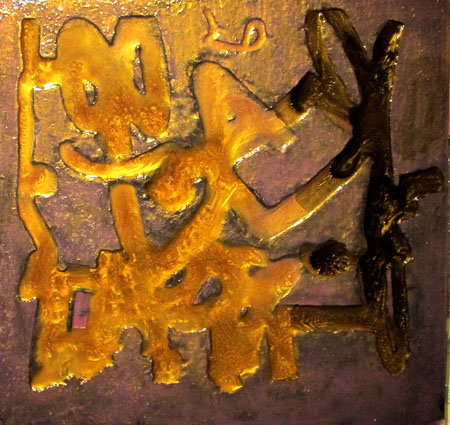
This one was painted over in black, so it’s not exactly an experiment. I then applied a layer of purplish/white varnish and, upon its hardening, a layer of varnish with gold.
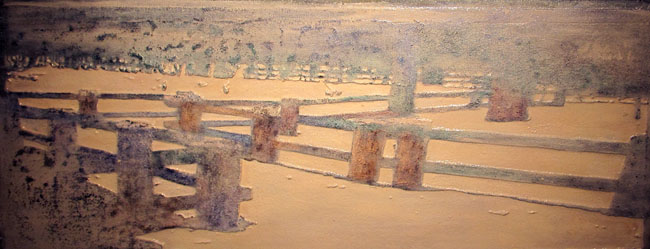
Finally, and apropos more to the culling side of things, is this old painting of railings on a snowy day. It had already received a lot of attention over time and I chose to hit it overall with whitened varnish as a final make-or-break gesture. The effect came out as creamlike, what with the brown cast of the vehicle, but it served to unify the composition somewhat. Not exactly a hit, but better.


The link works perfectly.
More later.
What do you mean by the word, “gesso?” That’s Italian for “plaster,” and refers, originally, to the intonaco coating for a painting layer of fresco.
How about reading up on that at http://www.AMIEN.org?
John:
I’m sure there are a number of gesso formulations. This is put out by Permanent Pigments and is gypsum with ten percent glue. The label does not specify what glue.
Jay,
Looking at the first painting, it appears that you gessoed the background because of the white peaking through the varnish. What shrank with heating, therefore, is the design. I suppose there are no cracks in the design because the foamula melts upon heating, thereby creating smooth depressions?
Why did the railing in the last painting accumulate more varnish than the meadow/dirt?
Your experimenting is inspirational. Must try to experiment more with my materials.
Birgit:
Gesso over the foam indeed. I might add that gesso was used because I have a jar of it that was sitting on a shelf. It is actually deficient as a masking agent, but the overall undulations in the surface that it allows seems to add to the visual interest. In the past I have painted a nice juicy application of primer that I then sprinkle with fine sand. This ends up as thicker and more resistant to heat. But, one thing about this particular gesso stuff is that it can be washed off later if I so desire. And, yes, the foam melts back, which can be controlled with patience and the paint removal gun at a moderate setting.
As for the railings painting: that is supposed to be snow on the ground. As I inferred, the painting was, and might still be, on the point of departure. So I went at it with a lot of whitish varnish, applied in “what the hell” mode. I then wiped the varnish off things like the posts and railings so as to give then greater prominence.
As always, your comments are appreciated.