|
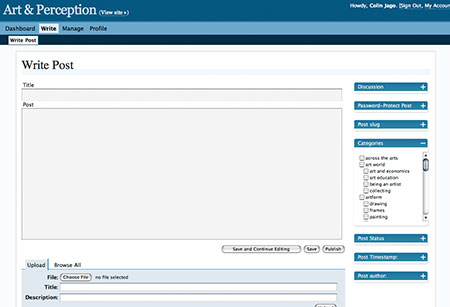
You need to find the upload tab which is at the bottom left of the page illustrated above, but might be off the bottom of your screen, depending on your display settings and screen size.
This is the bit you want:
|
|
|
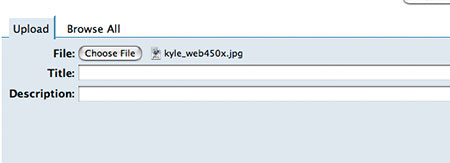
Click the choose file button. This will bring up a dialogue box with your file structure in it.
Select the image that you want.
|
|
|
The name of the image appears next to the choose file button, but nothing has happened yet.
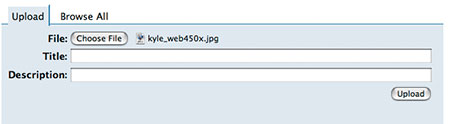
Next you need to click the upload button.
|
|
|
Not the tab on the left, but the button on the right.
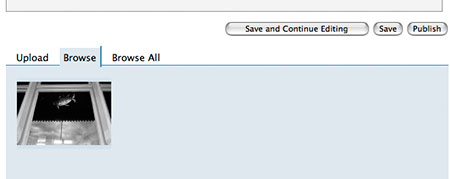
Doing so will make the screen look something like this:
|
|
|
At this point, the image is on the server, but not in your post.
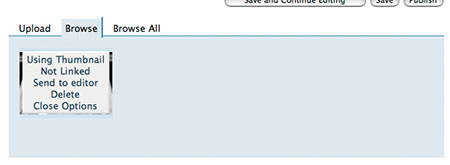
Next click on the image to bring up the menu, like this:
|
|
|
You can see that the menu has obliterated the mini image.
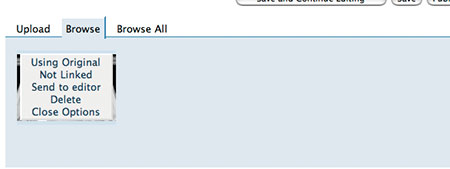
Click where it says using thumbnail, and it will look like this:
|
|
|
Click send to editor and then click close options.
The image is now in your post, and you should see text appear in the main writing screen which looks like this:
|
|
|
Go up to the text box and add the text that you want.
To create a little space under your picture, type
before typing the text.
|
|
|
Every time that you click the save and continue editing button, a preview (further down the page) is updated, so you can see how your post looks.
Text can be added before the picture as well as after it.
|
|
Updated on November 26, 2006